Rich Brownies Made With Starter
Highlighted under: Easy Desserts Inspiration
I absolutely love making these rich brownies, especially when I have leftover starter on hand. The combination of deep chocolate flavor and the tang from the starter creates a uniquely moist and flavorful treat that’s hard to resist. These brownies are not only simple to whip up but also turn out perfectly every time. Whether you’re hosting a gathering or just craving something sweet, these rich brownies are sure to impress. Plus, they make excellent companions to a scoop of ice cream for a decadent dessert.
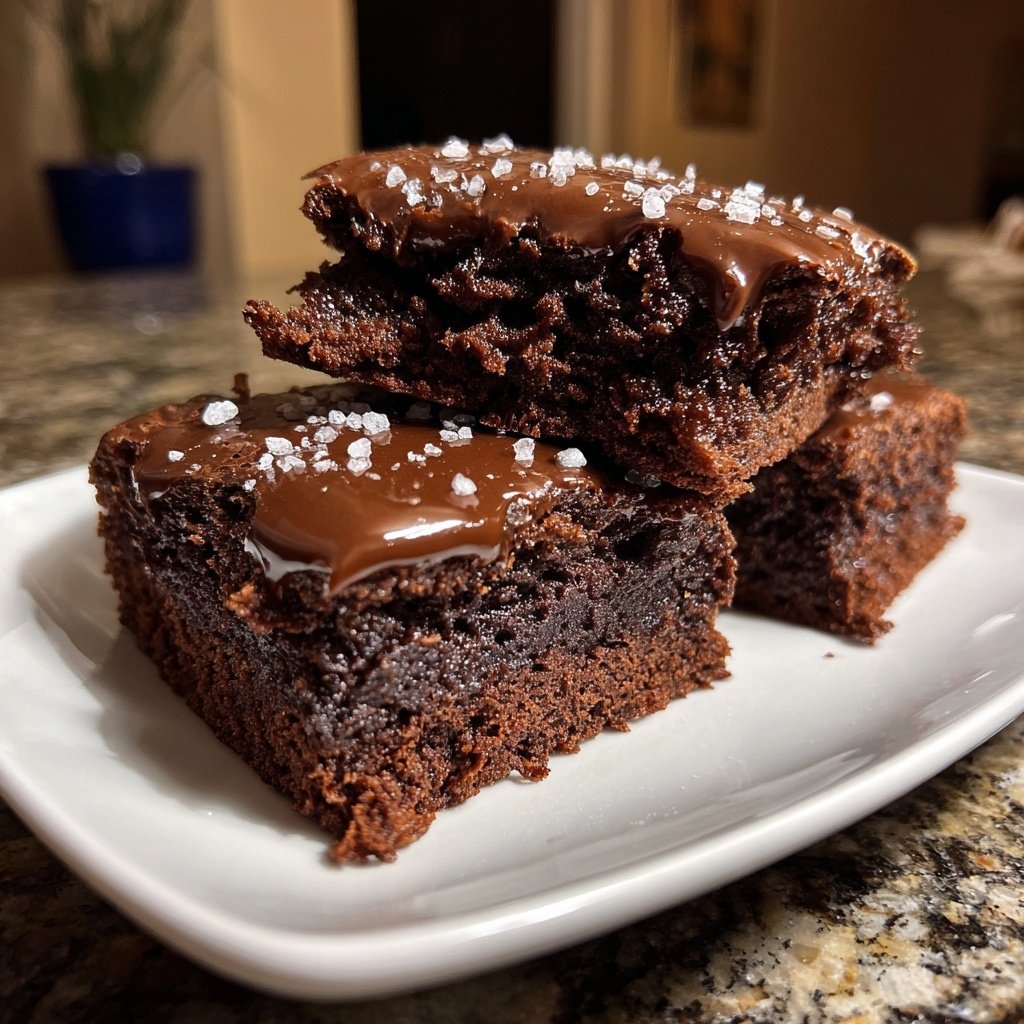
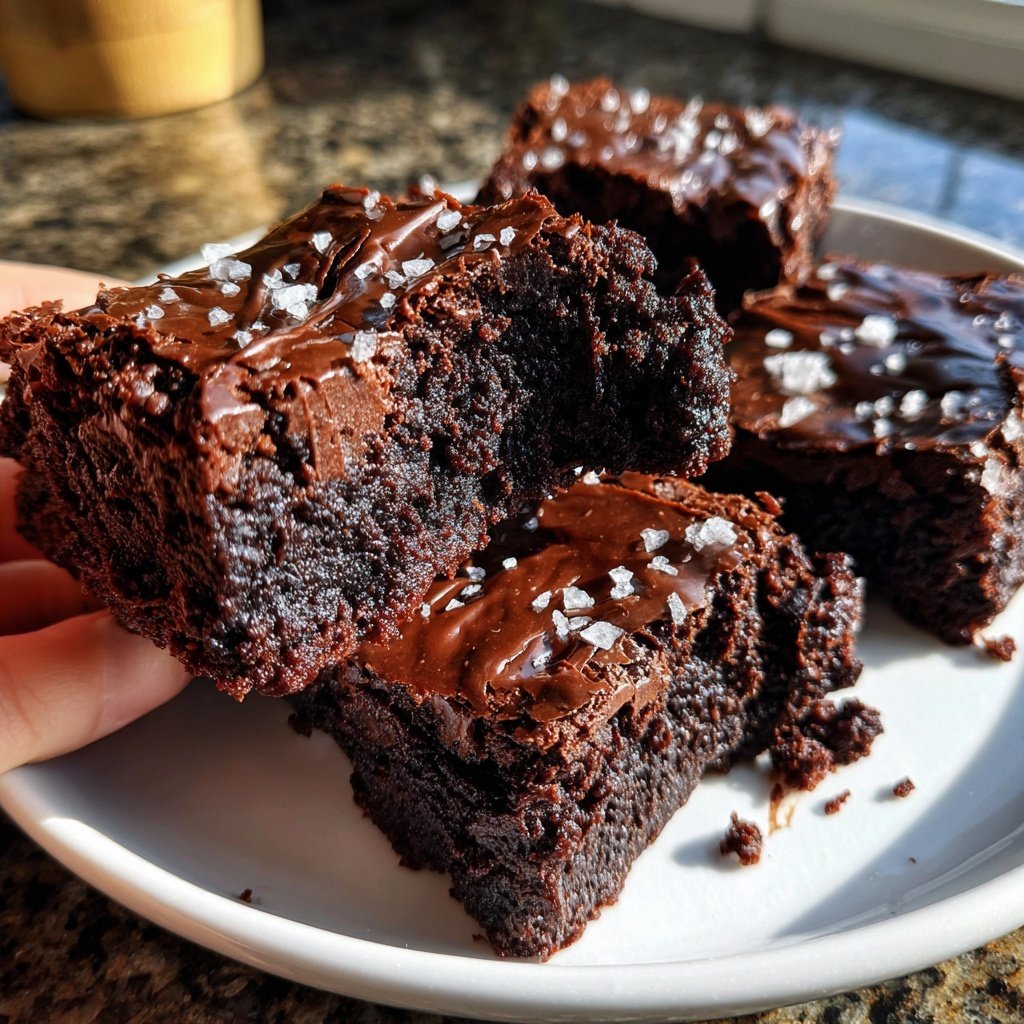
When I first experimented with using starter in brownies, I was pleasantly surprised by the end result. The tanginess from the starter elevates the chocolate flavor, making it both rich and balanced. I found that letting the brownies cool completely before cutting them results in cleaner edges and a more satisfying bite.
One of my favorite tips is to top the brownies with a sprinkle of sea salt just before baking. It enhances the overall flavors and adds a lovely contrast to the sweetness, making each piece unforgettable. I truly can’t get enough of these brownies!
Why You'll Love This Recipe
- Rich chocolate flavor paired with a hint of sourdough tang
- Incredibly moist and fudgy texture
- Quick and easy to prepare with minimal effort
The Role of Sourdough Starter
In this brownie recipe, the sourdough starter not only enhances the depth of flavor but also contributes to the rich and fudgy texture. The acidity from the starter reacts with the other ingredients, making the brownies exceptionally moist. If you're using discarded starter, don’t worry—a younger, less sour starter works just as well and will still add a nice complexity to the overall taste.
A well-fed, active starter will lend a more pronounced tang, which can elevate the flavor profile of your brownies. If you prefer a sweeter treat, consider using a more mature starter, as it will have a milder taste. Keep in mind that a thicker starter may require slight adjustments in liquid ingredients, so measure carefully and add a splash of water if needed.
Achieving the Perfect Texture
For perfectly moist brownies, make sure you don’t overmix the batter after adding the dry ingredients. Mix until just combined; this ensures that the gluten in the flour doesn’t develop too much, which can lead to a denser, cake-like texture instead of the desired fudginess. A few lumps are perfectly fine and contribute to that tender bite you're looking for.
Another tip for achieving that gooey center is to watch the baking time closely. You want to remove them from the oven when a toothpick inserted into the center comes out with a few moist crumbs—this indicates that they are cooked through but still wonderfully soft. Allowing the brownies to cool slightly in the pan before transferring them helps set the texture, making them easier to cut into neat squares.
Storage and Serving Suggestions
Once your brownies are cut, they can be stored in an airtight container at room temperature for up to five days. For longer storage, freeze them in individual portions; wrap each piece tightly in plastic wrap and place them in a freezer bag. To enjoy them later, simply thaw at room temperature or warm slightly in the microwave for a few seconds to refresh their texture.
These brownies are incredibly versatile when it comes to serving. They pair beautifully with a scoop of vanilla ice cream or a drizzle of chocolate sauce for an indulgent dessert. You can also add a sprinkle of sea salt on top to enhance the chocolate flavor or experiment with mix-ins like walnuts or caramel for a personalized touch.
Ingredients
Brownie Ingredients
- 1 cup unsalted butter
- 2 cups granulated sugar
- 1 cup sourdough starter (active or discarded)
- 4 large eggs
- 1 teaspoon vanilla extract
- 1 cup all-purpose flour
- 1 cup unsweetened cocoa powder
- 1 teaspoon baking powder
- 1/2 teaspoon salt
- 1 cup chocolate chips (optional)
Make sure all ingredients are at room temperature for best results.
Instructions
Prepare the Oven and Pan
Preheat your oven to 350°F (175°C) and grease a 9x13 inch baking pan or line it with parchment paper for easier removal.
Melt the Butter
In a medium saucepan, melt the butter over low heat. Remove from heat and stir in the granulated sugar until combined.
Mix in the Wet Ingredients
Add the sourdough starter, eggs, and vanilla extract to the butter and sugar mixture. Stir until smooth.
Combine Dry Ingredients
In a separate bowl, whisk together the flour, cocoa powder, baking powder, and salt.
Combine Wet and Dry Mixtures
Gradually add the dry ingredients to the wet mixture, stirring until just combined. Avoid overmixing.
Add Chocolate Chips
Fold in the chocolate chips if using, ensuring they are evenly distributed.
Bake
Pour the batter into the prepared baking pan and smooth the top. Bake for 25 minutes or until a toothpick inserted in the center comes out with a few moist crumbs.
Cool and Serve
Allow the brownies to cool in the pan for at least 10 minutes before transferring them to a wire rack. Cut into squares and enjoy!
Store any leftover brownies in an airtight container at room temperature for up to 4 days.
Pro Tips
- For a richer flavor, try adding a tablespoon of espresso powder to the dry ingredients.
Ingredient Substitutions
If you’re looking to make these brownies a bit healthier, consider replacing half of the granulated sugar with brown sugar. This substitution will add moisture and a subtle molasses flavor that complements the chocolate nicely. For a dairy-free version, swap the unsalted butter for coconut oil or a plant-based butter alternative.
For those with gluten sensitivities, using a gluten-free all-purpose flour blend should work without a hitch. Just be sure to check that the blend contains xanthan gum or another binder to help maintain that desirable brownie texture.
Troubleshooting Common Issues
If your brownies turn out too dry, it could be due to overbaking or inaccurate measuring of flour. Be precise and consider using a kitchen scale to measure your flour accurately. If they seem too wet, ensure you’re allowing sufficient baking time based on your oven’s idiosyncrasies—ovens can vary in temperature calibration.
Another common issue is brownies that sink in the middle as they cool. This can happen if you underbake them, so always perform the toothpick test to check for doneness. Alternatively, if you added too much starter, this could also introduce excess moisture, so stick to the recommended amount for consistent results.
Questions About Recipes
→ Can I use gluten-free flour in this recipe?
Yes, you can substitute gluten-free all-purpose flour, but the texture may vary slightly.
→ How long do these brownies last?
These brownies can be stored in an airtight container at room temperature for up to 4 days.
→ Can I add nuts to the brownies?
Absolutely! Feel free to fold in your favorite nuts, like walnuts or pecans, for added texture.
→ What should I serve these brownies with?
These brownies are delicious on their own but pair wonderfully with vanilla ice cream or a dollop of whipped cream.
Rich Brownies Made With Starter
Created by: Nicola Fairchild
Recipe Type: Easy Desserts Inspiration
Skill Level: Intermediate
Final Quantity: 16 brownies
What You'll Need
Brownie Ingredients
- 1 cup unsalted butter
- 2 cups granulated sugar
- 1 cup sourdough starter (active or discarded)
- 4 large eggs
- 1 teaspoon vanilla extract
- 1 cup all-purpose flour
- 1 cup unsweetened cocoa powder
- 1 teaspoon baking powder
- 1/2 teaspoon salt
- 1 cup chocolate chips (optional)
How-To Steps
Preheat your oven to 350°F (175°C) and grease a 9x13 inch baking pan or line it with parchment paper for easier removal.
In a medium saucepan, melt the butter over low heat. Remove from heat and stir in the granulated sugar until combined.
Add the sourdough starter, eggs, and vanilla extract to the butter and sugar mixture. Stir until smooth.
In a separate bowl, whisk together the flour, cocoa powder, baking powder, and salt.
Gradually add the dry ingredients to the wet mixture, stirring until just combined. Avoid overmixing.
Fold in the chocolate chips if using, ensuring they are evenly distributed.
Pour the batter into the prepared baking pan and smooth the top. Bake for 25 minutes or until a toothpick inserted in the center comes out with a few moist crumbs.
Allow the brownies to cool in the pan for at least 10 minutes before transferring them to a wire rack. Cut into squares and enjoy!
Extra Tips
- For a richer flavor, try adding a tablespoon of espresso powder to the dry ingredients.
Nutritional Breakdown (Per Serving)
- Calories: 380 kcal
- Total Fat: 26g
- Saturated Fat: 15g
- Cholesterol: 195mg
- Sodium: 85mg
- Total Carbohydrates: 32g
- Dietary Fiber: 3g
- Sugars: 24g
- Protein: 6g